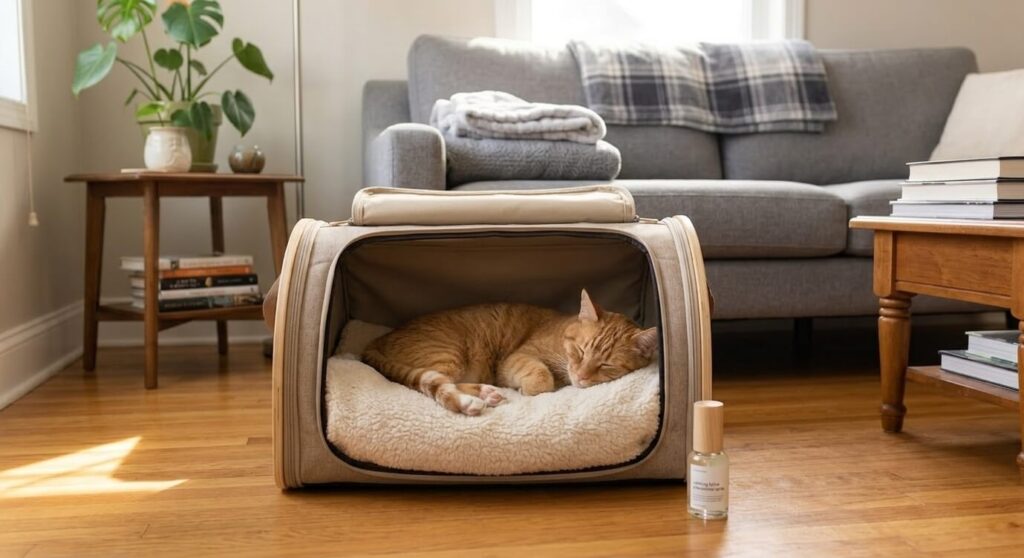
Cat carrier training starts with making the carrier feel like a safe everyday space, not a trap that appears only before stressful vet visits. In a small apartment, the carrier can become a familiar resting spot, feeding station, and calm travel tool when you introduce it gradually.
The biggest mistake is treating carrier panic, last-minute chasing, and stressful vet transport as a personality flaw. Most indoor cats are responding to access, timing, scent, boredom, discomfort, hunger, stress, or learned rewards. When the environment changes, the behavior usually changes too. The goal is to make the healthier option obvious, repeatable, and low-friction for both you and your cat.
For apartment cats, the practical question is not “What would be perfect?” It is “What can I repeat on a normal weekday when I am tired, the floor space is limited, and the neighbors can hear every loud crash?” A good plan survives real life: work schedules, tiny kitchens, rental rules, shared walls, and the fact that cats notice patterns faster than we do.
Use this guide as a decision framework. Start with the lowest-risk change, observe your cat’s response for a few days, and then adjust. If the issue involves pain, appetite change, vomiting, urinary signs, sudden aggression, severe fear, or major behavior change, treat it as a veterinary question before treating it as a training problem.

Quick Answer
Cat carrier training works best when you combine one immediate environmental fix with a repeatable routine. For most apartment cats, that means removing the reward for the unwanted behavior, adding a better legal alternative, and keeping the timing consistent long enough for the new pattern to become predictable.
Start with three questions: what is the cat getting from this behavior, what safe replacement can provide the same benefit, and what part of the apartment setup is making the unwanted behavior too easy? Once you answer those, the solution becomes much less mysterious.
A good first-week plan is simple: choose one main fix, make it visible and easy for your cat to use, remove competing rewards, and track the behavior for seven days. Do not change five things at once if you want to know what actually helped.
Important Apartment Safety Note
Safety comes before convenience. Avoid punishment, fear-based tools, essential oils, unsafe adhesives, unstable furniture, loose strings, small chewable parts, and any setup that blocks access to food, water, litter, hiding, or rest. Apartment solutions should make your cat’s environment clearer and safer, not more stressful or harder to navigate.
Why This Problem Happens in Apartments
Apartments compress a cat’s world. A cat in a house may have several rooms, different windows, staircases, quiet corners, and more distance from household activity. A cat in a studio or one-bedroom may have only a few predictable zones. That makes small details matter more: where the bowl sits, where the litter box opens, whether the couch is the tallest soft object, whether the window has a perch, and whether the evening routine leaves your cat wound up right when you want to sleep.
The apartment also magnifies consequences. A scratching habit becomes visible because there is only one couch. Odor becomes urgent because the litter box is near the living space. Boredom becomes loud because the hallway is short. A counter habit becomes risky because kitchens are compact and food smells linger. This is why cat carrier training needs an apartment-specific approach instead of generic advice.
The better frame is biological needs plus layout. Cats need to scratch, climb, hide, hunt, eat, observe, rest, and feel secure. If one of those needs has no acceptable outlet, your cat will improvise with whatever the apartment provides. Your job is not to suppress the need. Your job is to redirect it into a safer place.
Decision Table
| Training Stage | Goal | What to Do | Move On When |
|---|---|---|---|
| First fix | Start with the simplest repeatable change | Gives you a clean test | Changing everything at once |
| Apartment layout | Use walls, corners, windows, and routines | Saves floor space | Blocking litter, food, or exits |
| Safety check | Remove unstable, scented, sharp, or chewable hazards | Prevents preventable risk | Choosing style over access |
| Maintenance | Pick tools you will actually clean or repeat | Keeps the system working | Buying gear that adds friction |
| Behavior tracking | Watch frequency, timing, and intensity | Shows whether the plan works | Judging after one bad day |
Step 1: Identify the Real Reward
Before buying anything, ask what your cat gets from the behavior. The reward may be height, food, warmth, attention, texture, scent marking, privacy, novelty, or a predictable reaction from you. If you misidentify the reward, the fix will feel random. For example, a cat scratching the couch may not want “a scratching post” in the abstract. They may want a tall, stable surface beside the social resting area where your scent is strongest. A cat waking you at night may not be hungry; they may have learned that your movement starts the day.
Watch the behavior for three days. Write down the time, location, what happened right before it, and what your cat got afterward. Did you talk, feed, chase, clean, open a door, move a toy, or give attention? Patterns usually appear quickly. Once you see the reward, you can build a replacement that competes fairly.
This is also where health boundaries matter. If a behavior appears suddenly, intensifies quickly, or comes with appetite, litter box, mobility, vocalization, or grooming changes, do not assume it is only habit. Cats hide discomfort well, and apartment routines can make subtle changes look like personality.
Step 2: Build the Legal Alternative First
Many owners start by blocking the unwanted behavior. That can help, but only if the cat already has a better legal option. If you remove access without replacement, your cat may redirect the same need somewhere worse. The legal alternative should be close to the original reward. If the reward is height, add height. If the reward is food search, add foraging. If the reward is privacy, add a hiding zone. If the reward is scratching texture, match texture and stability.
In a small apartment, the best legal alternatives are usually vertical or multi-use. A window perch, shelf, tall scratcher, washable bed, puzzle feeder, or covered hiding spot can create more cat territory without taking over the room. Choose fewer, better pieces rather than a pile of objects your cat ignores.
Placement matters more than price. Put the replacement where the behavior already happens or where the biological need naturally appears. A scratcher hidden in a corner will not beat a couch your cat uses daily. A puzzle feeder placed in the wrong traffic zone may not feel safe. A water bowl beside food may be ignored even if the bowl is expensive.
Step 3: Remove the Competing Reward
Once the legal option exists, reduce the payoff from the old behavior. This does not mean scaring your cat. It means making the old route less interesting, less accessible, or less rewarding while the new route becomes easier. Clean food residue, protect fabric temporarily, close doors during risky periods, move fragile objects, use washable covers, or change traffic flow.
The key is consistency. If the old behavior works one out of every five times, many cats will keep testing it. Intermittent rewards are powerful. That is why schedules matter so much for indoor cats. Predictable meals, play, cleaning, and attention reduce the need for your cat to experiment loudly.
Avoid punishment. Yelling, spraying water, startling noises, and chasing can create fear without teaching the replacement behavior. They can also damage trust, increase hiding, and make the behavior happen only when you are not watching. A calmer plan is slower for a few days and stronger over time.
Step 4: Match the Fix to Your Apartment Type
A studio apartment needs different solutions than a two-bedroom. In a studio, every zone overlaps. The litter box may be near the living area, the bed may be the main resting space, and the kitchen may be unavoidable. Your fixes should be compact, cleanable, and visually calm. Vertical space is usually the best way to add territory without sacrificing floor space.
A one-bedroom gives you more zoning options. You can create a sleep zone, feeding zone, litter zone, and play route. Use doors carefully: a closed door can reduce risk, but it can also block access to resources if you forget. Multi-cat homes need duplicate resources because one cat can block another in narrow spaces.
Rental apartments add another layer. Avoid permanent holes, adhesive damage, strong fragrance, or equipment that violates lease rules. The best renter solutions are freestanding, tension-mounted, washable, or removable without residue. Photograph setups before and after if you are worried about deposit disputes.
Step 5: Create a Simple Weekly Routine
The apartment should do some of the work, but routine finishes the job. Cats are pattern readers. A predictable rhythm makes them calmer because they no longer need to test when food, play, attention, or access will happen. Your routine does not need to be elaborate. It needs to be repeatable.
A simple weekly rhythm could include a five-minute morning reset, one food puzzle or enrichment setup before work, a short evening play session, and a weekly cleaning or rotation check. For behavior problems, track one metric: frequency, duration, or intensity. If you track everything, you will stop tracking. If you track one useful signal, you will know whether the plan is working.
Do not judge the plan by the first two days. Some cats increase the behavior briefly when the old reward stops. That does not mean the plan failed. It often means the old pattern is being tested. Stay consistent unless your cat shows distress, health signs, or resource avoidance.
Common Mistakes to Avoid
The first mistake is buying the most attractive product instead of the most useful one. Cats do not care whether the object matches your room if it wobbles, smells strange, blocks access, or sits in the wrong place. Function comes first. Style can follow.
The second mistake is adding clutter instead of structure. More toys, more beds, or more gadgets do not automatically create enrichment. A small number of well-placed, well-used resources is better than a pile of neglected objects. Rotate extras instead of displaying everything.
The third mistake is ignoring maintenance. A solution you will not clean, refill, inspect, or reset is not a solution. Apartment life rewards easy systems. Choose washable fabrics, reachable corners, visible reminders, and tools that fit your real schedule.
The fourth mistake is skipping the vet when the pattern changes suddenly. Behavior and health overlap. Pain, nausea, urinary discomfort, dental disease, arthritis, kidney disease, anxiety, and sensory decline can all appear as changes in routine or personality.
Apartment Case Example
Imagine a one-bedroom apartment where the main problem happens every evening. The owner gets home, feeds the cat, sits down, and the cat starts pacing, vocalizing, scratching, or climbing something forbidden. The old reaction is inconsistent: sometimes the owner plays, sometimes gives a snack, sometimes scolds, sometimes ignores. From the cat’s perspective, the evening is a slot machine.
A better plan is predictable. Five minutes after coming home, the owner gives a short interactive play session. Dinner follows. The legal resource is already placed near the old behavior zone. The old reward is removed. The owner tracks whether the behavior appears before dinner, after dinner, or near bedtime. Within two weeks, the cat has a clearer rhythm and fewer reasons to escalate.
This kind of plan is not dramatic. That is the point. Good apartment cat care is often quiet, boring, and repeatable. The cat learns what works. The owner stops improvising. The room becomes easier for both of them.
How to Know the Plan Is Working
Look for trend, not perfection. A working plan usually reduces the frequency, intensity, or duration of the problem. Your cat may still test the old behavior occasionally, especially when hungry, bored, stressed, or excited. That does not erase progress.
Useful signs include calmer transitions, faster settling, better use of legal resources, fewer repeated demands, less destructive behavior, more predictable appetite, and less conflict between you and your cat. If the problem is hygiene-related, look for cleaner paths, less odor, easier maintenance, and continued litter box acceptance.
If nothing changes after two to three weeks of consistent effort, reassess the reward. You may have solved the wrong problem. If the behavior worsens or your cat seems distressed, bring in veterinary or behavior support sooner.
Seven-Day Apartment Implementation Plan
A useful cat carrier training plan needs a short test window. Seven days is long enough to see a pattern, but short enough that you will actually finish it. The goal is not to solve every related issue in one week. The goal is to make one clear improvement, remove one competing reward, and learn what your cat responds to in this specific apartment.
Day 1 is observation. Do not change much yet. Write down when the behavior happens, where it happens, what your cat was doing right before it, and what happened immediately afterward. Include small details: food timing, your work schedule, visitors, cleaning, closed doors, loud hallway noise, weather, or whether the window was available. Apartment cats often react to patterns we overlook because the environment is compact and predictable.
Day 2 is setup. Choose one legal alternative and place it where it can actually compete. If the issue is height, the alternative must be high enough. If the issue is scratching, it must be stable and close enough. If the issue is boredom, the enrichment must appear before the problem time, not after your cat has already escalated. If the issue is hygiene, the fix must be easy to clean every day.
Day 3 is reward control. Remove the hidden payoff from the old behavior. Clean food smells, cover tempting fabric, move fragile objects, change the route out of the litter box, close access during the riskiest window, or stop giving attention to the exact behavior you want to reduce. This step works only if the legal alternative is already available.
Day 4 is routine. Attach the new behavior to something that already happens: breakfast, your lunch break, the end of work, dinner, or bedtime. Cats learn daily rhythms quickly. A routine that happens at the same time and in the same order is easier for your cat to trust than a perfect plan you use only occasionally.
Day 5 is adjustment. If your cat ignores the setup, do not assume they are stubborn. Change one variable: location, height, texture, scent, stability, difficulty, or timing. Keep the rest of the plan the same so you can tell what changed.
Day 6 is stress checking. Ask whether the problem is truly about training or whether your cat seems unsettled. Hiding, appetite change, litter box changes, overgrooming, aggression, unusual vocalization, or sudden clinginess should move the issue into a health or stress conversation. Apartment fixes are useful, but they should not delay veterinary care when red flags appear.
Day 7 is review. Compare the first day with the seventh day. Did the behavior happen less often? Was it shorter? Was it less intense? Did your cat use the legal alternative? Did maintenance feel realistic for you? Keep what worked, remove what added clutter, and plan the next small change.
Small Apartment Variations
In a studio, keep the plan visible and simple. You may not have a spare room, so create micro-zones: one vertical zone, one quiet resting zone, one feeding or foraging zone, and one litter zone with a clean exit path. Avoid bulky fixes that block movement. The best studio solutions usually use wall height, window access, washable mats, compact storage, and predictable timing.
In a one-bedroom, use the door as a management tool without accidentally blocking resources. A bedroom can become a calm zone, recovery zone, feeding zone, or temporary safe room. But if your cat needs access to water, litter, or a familiar resting spot, do not close them away from those resources. The more you use doors, the more carefully you need to map access.
In a multi-cat apartment, duplicate important resources. One cat can quietly control a doorway, litter route, window perch, or food bowl without obvious fighting. If one cat is not using the new setup, consider whether another cat is blocking access. Spread resources across zones when possible, even if the apartment is small.
For renters, think in removable layers. Use washable covers, freestanding furniture, tension solutions, non-damaging barriers, cabinet organization, and temporary placement changes before drilling or using adhesive products. If you do use adhesive, test it where damage will not matter and remove it slowly according to the product instructions.
What to Track Without Overcomplicating It
Tracking should make the plan easier, not turn you into a full-time data collector. Pick one primary metric. For behavior topics, count how many times the behavior happens per day. For hygiene topics, track how long the area stays clean or odor-free. For health-adjacent topics, track appetite, water intake, stool or urine pattern, weight trend, or energy only in the limited way an owner can observe at home.
Use plain notes. For example: “Tuesday, 8:30 PM, scratched couch twice before play, used post after treats, no overnight scratching.” That kind of note is more useful than a vague memory that the week was “better” or “worse.” It also helps if you later need to describe the pattern to a veterinarian or behavior professional.
The best sign is not perfection. It is predictability. If your cat starts choosing the legal outlet more often, settles faster, recovers sooner, or shows less intensity, the plan is moving in the right direction. If the behavior becomes more frantic, your cat avoids normal resources, or new symptoms appear, stop treating it as a simple apartment problem and get help.
Owner Routine: The Part That Usually Decides Success
Most plans fail because the human routine is too complicated. A solution that depends on fifteen minutes of setup every morning may work for three days and then collapse. A solution that takes thirty seconds and sits beside something you already do is more likely to last.
Put supplies where the routine happens. Keep the toy near the evening chair, the brush near the couch, the cleaning tool beside the litter area, the carrier in the room rather than in storage, or the puzzle feeder near the food container. Friction is the enemy. If you have to search for the tool, the routine will fade.
Build the habit around existing anchors: after coffee, before work, after dinner, before bed, or during weekly cleaning. Indoor cats thrive on patterns, and owners do too. The easier the plan is for you, the more stable it becomes for your cat.
Finally, remove failed experiments. If a product is ignored, unsafe, hard to clean, or making the apartment feel chaotic, it is not serving the plan. A cleaner, smaller, more consistent setup usually beats a crowded one.
FAQ
1. How long does cat carrier training actually take from start to finish?
Effective cat carrier training for a cat with an established negative association typically takes four to eight weeks when following the gradual protocol described in this guide. Cats with mild or neutral associations (no strong negative history) often complete the process in two to three weeks.
The variable that most affects timeline is how consistently the twice-daily treat sessions are maintained — irregular sessions extend the timeline significantly because the counter-conditioning requires repeated, consistent positive experiences to build a new association.
Skipping several days essentially resets some of the progress. If you are working with a cat who had a particularly traumatic carrier history, budget eight weeks and do not rush the door-closing step.
2. My cat enters the carrier but completely panics when I close the door. What do I do?
This means you’ve moved to the door-closing step before the treat-inside association is fully established, or the treat value isn’t high enough to maintain engagement during the novel experience of the door closing.
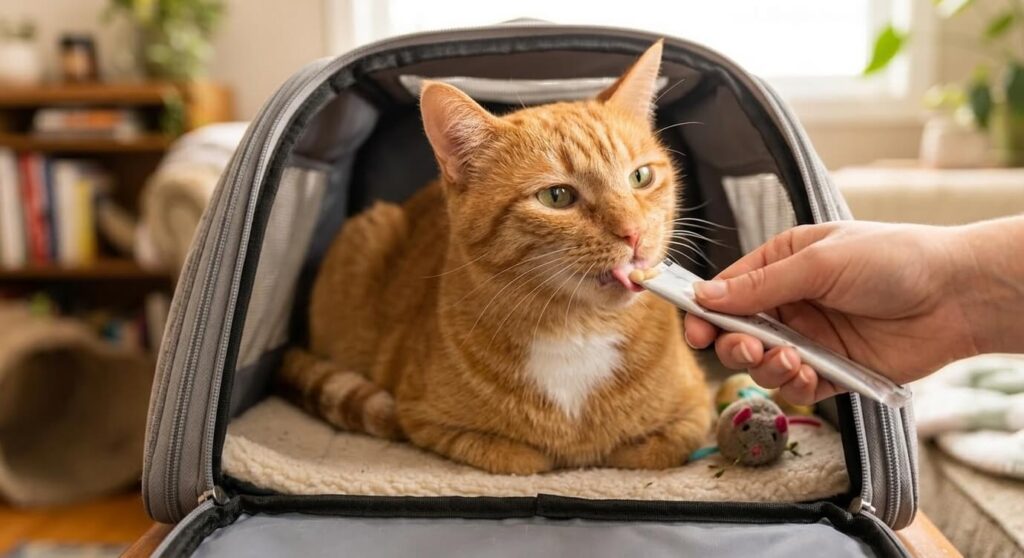
Go back to the previous step — cat enters, treat is delivered, door is never touched — and spend an additional week building that foundation before reintroducing door movement. When you do reintroduce the door, start with just touching it rather than moving it, and use your highest-value treat (a lickable puree that requires thirty or more seconds of sustained licking works best here).
The licking behavior itself is slightly calming through repetitive oral motion, and keeping the treat experience continuing through the door closure prevents the panic response from developing.
3. My cat refuses to enter the carrier even after weeks of treats at the entrance. How do I break through this?
If your cat will approach the carrier exterior but won’t cross the threshold, the carrier interior still registers as threatening despite the treat presence. Try these additional approaches: place the carrier on its end with the opening facing upward — some cats find a top-entry configuration less threatening than a horizontal entry, and this allows you to lower treats in from above.
Alternatively, remove the carrier door entirely for an additional two weeks and place treats progressively further inside with no door-related stimulus at all. Some cats also respond to adding a worn article of your clothing across the carrier threshold — your scent literally bridging the gap between safe and uncertain territory.
If after eight weeks of consistent effort there is no progress, discuss pre-visit medication options (gabapentin is commonly used) with your vet as a parallel strategy while you continue the behavioral protocol.
How long does it take for cat carrier training changes to work?
Most cats need one to three weeks of consistency before the new pattern feels normal. Some changes, such as moving food residue or improving access, can help immediately. Habit-based behaviors take longer because your cat has learned that the old routine sometimes works. Track the trend instead of expecting a perfect first week.
What if my cat ignores the new setup?
Assume the setup is not matching the real reward. Check placement, stability, scent, height, texture, and timing. Put the new option closer to where the behavior already happens, make it easier to use, and reduce competing rewards from the old location. If your cat avoids it completely, inspect for wobble, noise, strong odor, or uncomfortable texture.
When should I call a veterinarian?
Call your veterinarian if the behavior is sudden, severe, or paired with appetite change, vomiting, diarrhea, weight loss, urinary changes, limping, hiding, aggression, excessive vocalization, confusion, or obvious pain. Apartment behavior problems can be environmental, but they can also be the first visible sign that your cat feels unwell.
Can I fix this without buying more cat stuff?
Often, yes. Many apartment fixes begin with placement, timing, cleaning, routine, and removing rewards. You may need one well-chosen item, but you rarely need a pile of products. Start by using what you already have more strategically, then buy only when a specific biological need is still unmet.
Related Apartment Guides
A trained carrier also matters during apartment emergencies. Read our apartment cat emergency evacuation plan.
If car travel is the next step, pair the carrier plan with car safety routines. Read our traveling with a cat in a car.
If the carrier is for boarding or sitter handoff, choose care plans before the trip. Read our cat boarding vs pet sitter care.
If your cat bolts when stressed, fix hallway and door routines too. Read our stop cat from bolting out the apartment door.
Final Thoughts
Cat carrier training becomes easier when you stop treating the issue as a single annoying behavior and start treating it as an apartment system. Your cat is responding to layout, timing, access, rewards, and comfort. Change those inputs carefully, and the output usually changes too.
Start small. Choose one legal alternative, one reward to remove, and one metric to track for the next week. If the behavior improves, build from there. If it does not, reassess the real reward and check for health or stress signals.
Indoor cats do best when their homes make natural behavior safe. That is the quiet goal behind every good apartment cat plan: fewer battles, clearer routines, safer choices, and a home that works for both species.
References
AAFP and ISFM feline environmental needs guidelines
VCA Hospitals pet health library
Merck Veterinary Manual cat behavior overview
Rodan, I., et al. (2011). AAFP and ISFM Feline-Friendly Handling Guidelines. Journal of Feline Medicine and Surgery, 13(5), 364–375. https://journals.sagepub.com/doi/10.1016/j.jfms.2011.03.012
Prata, N. M. (2020). Application of synthetic feline facial pheromones in the veterinary clinic. Veterinary Medicine and Science, 11(2), 52–61. https://www.ncbi.nlm.nih.gov/pmc/articles/PMC7143165/
-300x169.png)
-300x169.png)