Introduction: The Lease That Almost Grounded My Cat
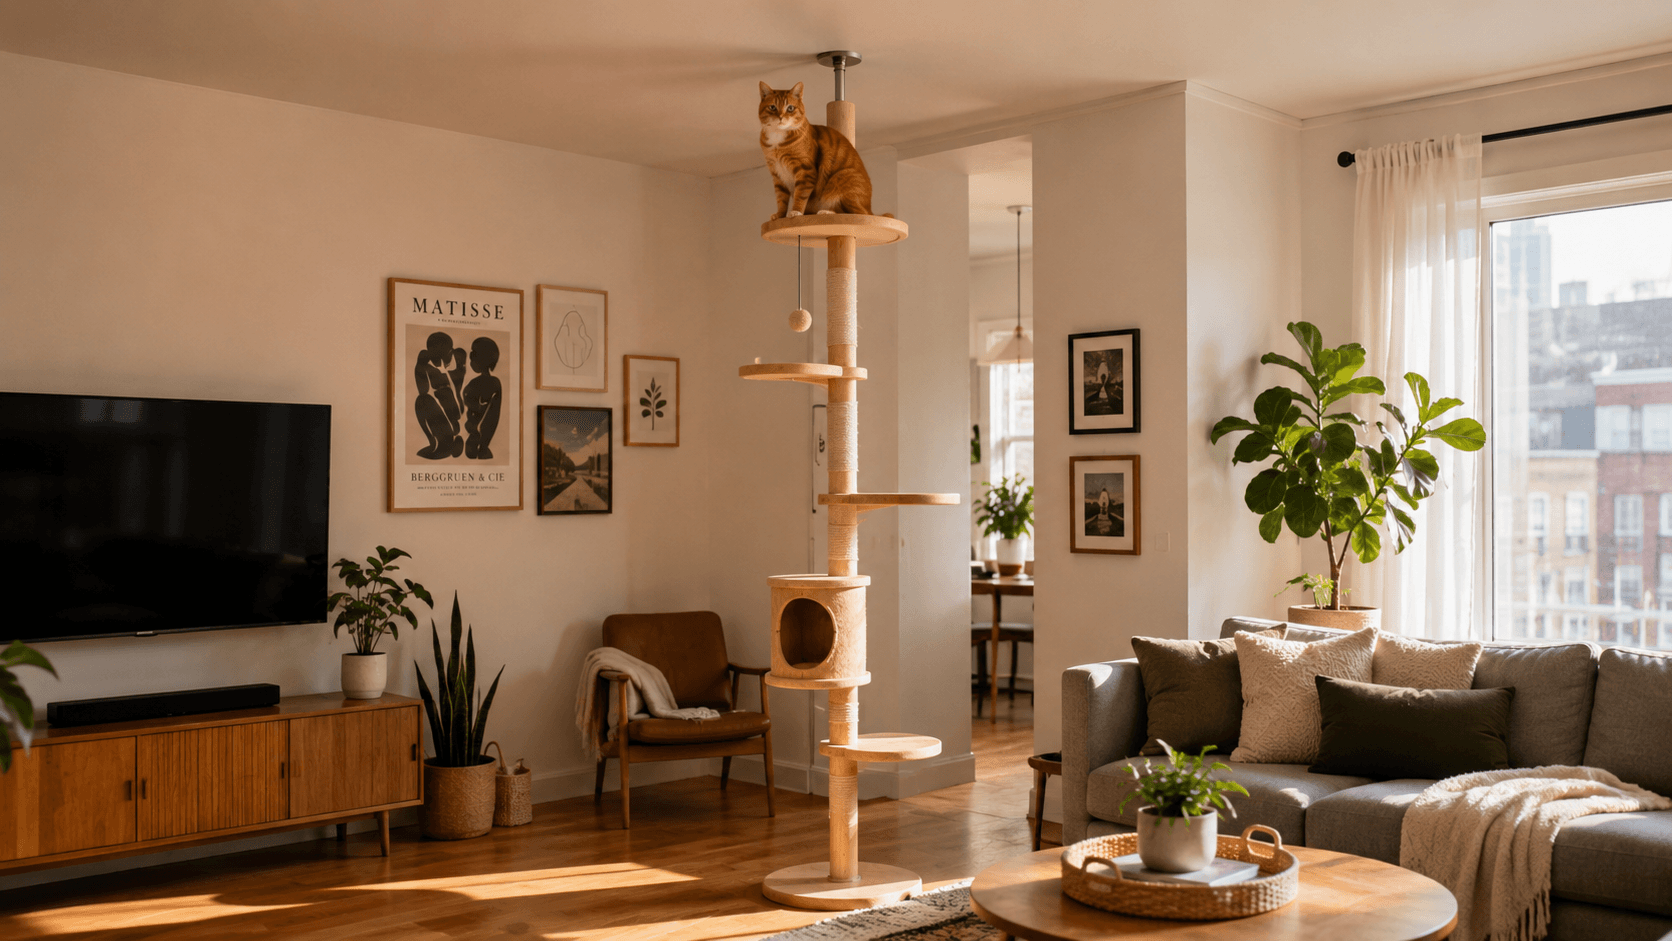
I found the apartment on a Tuesday and signed the lease by Thursday — natural light, exposed brick, a kitchen I actually wanted to cook in, and a landlord who seemed reasonable right up until I read clause 14, subsection B: “No drilling, nailing, or permanent alterations to walls, ceilings, or structural surfaces.”
I stood in my empty living room and looked at Oliver, who looked back at me with the specific expression of a cat who expects infrastructure. As a certified veterinary technician, I evaluate diy renter friendly cat shelves the same way I evaluate any clinical equipment — by load-bearing capacity, fall-risk profile, and joint-impact safety for a cat who lands on surfaces repeatedly across a lifetime.
The idea of Oliver being entirely floor-bound in a lease-compliant apartment was not an aesthetic problem. It was a welfare problem. Cats denied vertical territory show measurably elevated stress markers, increased inter-animal conflict, and higher rates of anxiety-related inappropriate elimination. ¹
I spent the following two weeks engineering the most structurally sound, deposit-protecting, landlord-approved vertical cat environment I have ever built. No drill touched a single wall. Oliver currently travels between five elevation points ranging from three to seven feet. This guide is exactly how I did it — and how you can too.
Quick Answer: How to Create No-Drill Cat Shelves?
To build diy renter friendly cat shelves, prioritize tension-based systems like floor-to-ceiling poles, over-the-door mounting kits, or heavy-duty furniture hacking (like IKEA Billy extensions). For lightweight cats, industrial-strength Command Strips on non-porous surfaces work, but always prioritize mechanical stability to prevent falls and protect your Security Deposit.
Disclosure: This article may contain affiliate links. If you buy through our links, Indoor Cat Expert may earn a commission at no extra cost to you. We only recommend products we believe are relevant to indoor cat owners.

Table of Contents
The Renter’s Paradox: Why Feline Instincts Clash with Leases
The conflict between a standard apartment lease and a cat’s biological requirements is not a matter of preference. It is a collision between legal document and evolutionary programming.
Domestic cats retain the complete neurological architecture of their wild ancestors — animals who navigated three-dimensional territory, used elevation to assess threat and opportunity, and experienced ground-level existence as a state of maximum vulnerability.
Environmental Agency — the ability to choose their position within a space, including vertical positions — is not enrichment. It is a baseline welfare requirement according to the American Association of Feline Practitioners’ environmental needs guidelines. ¹
When we remove vertical options through lease compliance, we are not simply inconveniencing our cats. We are systematically eliminating their primary stress-management mechanism. A cat who cannot access elevation when threatened — by a noise, a visitor, another animal, or simply the ambient anxiety of modern apartment life — has no functional retreat.
The behavioral consequences are predictable and well-documented: increased hiding, reduced play engagement, stress-triggered illness, and the kind of chronic low-grade anxiety that shortens lives.
The renter’s paradox is this: The lease protects the walls. The cat’s welfare requires the walls — or something that approximates their function without touching them.
Diy renter friendly cat shelves exist precisely to resolve this paradox. They are not a compromise. When engineered correctly, they are a genuinely superior alternative — reconfigurable, portable when you move, and buildable without a single relationship-damaging conversation with your landlord.
Adding vertical routes through diy renter friendly cat shelves is also a key strategy for the broader environmental enrichment approach we addressed in our guide to solving feline boredom with puzzle feeders— vertical space and cognitive stimulation work synergistically to produce a genuinely enriched indoor environment.
5 Genius Hacks: How to Build DIY Renter Friendly Cat Shelves
Hack 1: The Tension Pole ‘Tree’
The tension pole system is the single most structurally reliable method for creating diy renter friendly cat shelves in a lease-restricted apartment, and it is the foundation of Oliver’s entire vertical environment.
The mechanical principle: A floor-to-ceiling tension pole works by compressing between two surfaces — your floor and your ceiling — with enough force to create a structurally stable vertical axis. No adhesive. No hardware. No wall contact whatsoever. The system is entirely self-supporting through compression physics, the same principle that allows a car jack to lift thousands of pounds without being bolted to anything.
The components:
- Base pole system: Brands like Spievert, Ergocat, or repurposed closet tension poles (minimum 1.5-inch diameter for structural stability)
- Platform attachments: Wrap-around bracket platforms in wood or composite, secured to the pole with compression clamps — no screws penetrate the pole
- Surface traction layers: Sisal rope wrapped around the pole between platforms; anti-slip cork or carpet tile on each platform surface
- Ceiling protection: A 6-inch square of furniture felt between the pole cap and your ceiling surface — distributes pressure and prevents paint marking
-1024x576.png)
Load-bearing specifications for the tension pole system:
| Cat Weight | Minimum Pole Diameter | Recommended Platform Size | Maximum Platform Height |
|---|---|---|---|
| Under 8 lbs | 1.25 inches | 12″ x 12″ | 7 feet |
| 8–12 lbs | 1.5 inches | 14″ x 14″ | 7 feet |
| 12–16 lbs | 1.75 inches | 16″ x 16″ | 6.5 feet |
| Over 16 lbs | 2+ inches | 18″ x 18″ | 6 feet |
Installation protocol:
- Measure your ceiling height precisely — measure in three spots, as apartments frequently have ceiling variation of up to half an inch
- Extend the pole to ceiling height minus two inches
- Position the base pad on the floor at your chosen location (corner placement provides two-surface stability and reduces tip risk)
- Compress the pole upward until the ceiling cap makes firm contact — you should not be able to rotate the pole by hand when correctly tensioned
- Test Load-bearing Capacity before allowing cat access: apply 1.5x your cat’s body weight as downward pressure to each platform and observe for any pole movement
- Re-tension monthly — thermal expansion and contraction of building materials can reduce pole compression over time
The stability enhancement I use with Oliver: Position the tension pole base within 4 inches of an existing piece of furniture — a bookshelf, a heavy dresser — and use two adjustable velcro furniture straps to loosely connect the pole to the furniture at mid-height. This creates a lateral stability system that prevents any rotational movement without touching a wall.
Hack 2: The Over-the-Door Expressway
The over-the-door mounting system is the most underutilized method in diy renter friendly cat shelves design, and it is particularly powerful in apartments with multiple interior doors because it creates genuine multi-room connectivity.
The mechanical principle: Over-the-door hooks and mounting brackets grip the door frame through gravity and compression — the same physics that allow over-the-door shoe organizers to hold 20+ pounds of shoes without damaging the door.
This setup is a key component for realizing the creative cat superhighway ideas we established for studio apartments.
The system components:
- Heavy-duty over-the-door shelf brackets — look for steel construction rated at minimum 50 lbs per bracket, with rubber-coated door hooks that prevent paint damage
- Shelf boards — 3/4-inch birch plywood cut to your chosen dimensions, finished with pet-safe polyurethane and topped with non-slip cork sheet or sisal matting
- Two brackets per shelf — one on each side of the door frame, creating a bridge-shelf that spans the door opening at whatever height you choose
- Door-closing compatibility — measure your door frame depth carefully; most interior doors allow an over-the-door shelf without preventing the door from closing
The Expressway Configuration:
Rather than a single shelf, the Expressway uses three shelves at staggered heights — one at 4 feet, one at 5.5 feet, and one at 6.5 feet — creating a vertical climbing route that Oliver uses approximately 40 times per day. Each shelf is 10 inches deep and 28 inches wide, comfortably accommodating his full body length in a resting position.
The safety engineering details:
- Route all three shelves on the same door to create a contained vertical system
- Attach a short sisal scratching pad to the wall-facing edge of each shelf — this gives cats something to grip on the ascent
- Install the lowest shelf at a height your cat can reach from the floor with a comfortable jump — for Oliver (12 pounds, moderate athleticism), this is 36 inches
- Ensure the door selected for this system is a low-traffic interior door — a bedroom door or home office door that is not constantly opening and closing is ideal
The door-frame weight distribution check:
Stand on one foot and press down on each bracket with your full body weight before loading the system. Any bracket that shifts, rotates, or produces movement in the door frame should be removed and replaced with a heavier-gauge alternative before your cat uses the system.
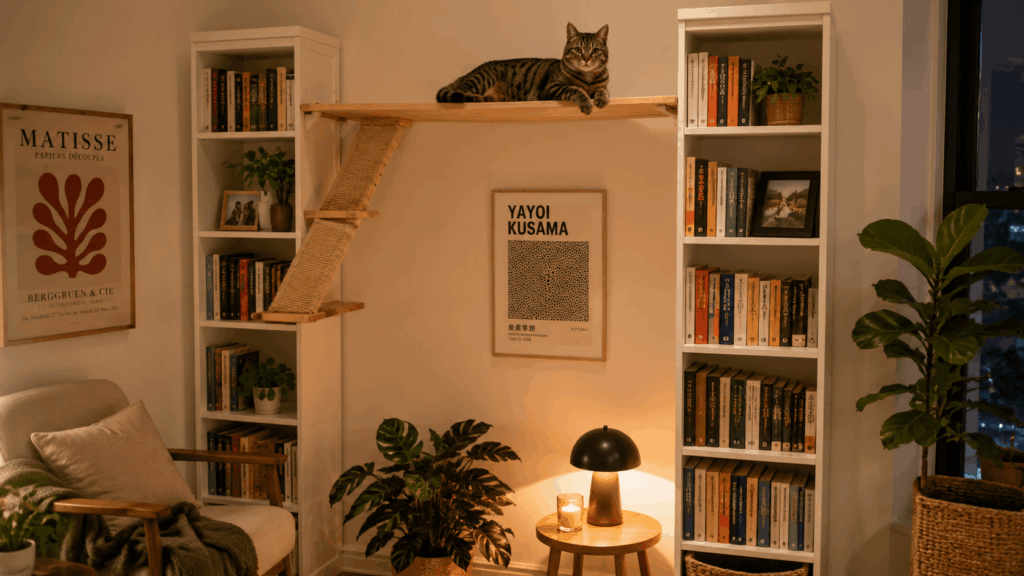
Hack 3: The Bookshelf-Bridge Hack
This is the hack that produces the most aesthetically sophisticated diy renter friendly cat shelves result — and the one that most consistently makes visitors ask “did you hire someone to design this?”
The mechanical principle: Freestanding bookshelves have substantial inherent Load-bearing Capacity — a standard IKEA Billy bookshelf, for example, is rated for 66 lbs per shelf when properly assembled. By connecting two or more bookshelves with bridge platforms at their tops, you create a continuous elevated pathway that is entirely self-supporting, floor-standing, and completely wall-independent.
The IKEA Billy Extension Configuration:
- Purchase two IKEA Billy bookshelves (or equivalent) in the same height — the 79-inch height is ideal for most standard apartment ceilings
- Assemble both units and load the lower shelves with books or other heavy items — this adds ballast weight that dramatically increases tip resistance
- Position the units 24–36 inches apart
- Cut a bridge platform from 3/4-inch plywood to span the gap between the two shelf tops — approximately 16 inches wide, spanning the full 24–36 inch gap plus 6 inches of overlap onto each shelf top
- Secure the bridge to each shelf top using furniture connector bolts — these pass through the shelf surface without touching any wall
- Top the bridge with sisal matting or cork non-slip surface
- Anti-tip the entire system by connecting the two bookshelves to each other with furniture straps at mid-height — this creates a self-stabilizing linked unit that resists tip forces from any direction without wall contact
The multi-unit expansion:
Add a third bookshelf unit at a perpendicular angle to the first two, creating an L-shaped elevated pathway system that covers an entire room corner. This is the configuration in my apartment, and it gives Oliver approximately 14 linear feet of elevated travel route without a single wall-mounted component.
Stability verification protocol:
- With the unit fully assembled and loaded, attempt to tip the linked system by applying lateral force at the top bridge — it should not move more than 1/4 inch
- Verify that all furniture connector bolts are fully seated
- Re-check bolt tension every 90 days — vibration from normal use can gradually loosen compression fittings
Hack 4: The Window-Frame Hammock
The window-frame hammock is the most beloved component of Oliver’s vertical environment — and the one that serves the dual function of diy renter friendly cat shelves and what I call ‘Cat TV’: the enrichment value of visual access to the outdoor environment.
The mechanical principle: Window frames are structural elements — they bear the load of the window itself, which in a standard apartment window runs 15–40 pounds. A properly designed window-frame mounting system uses the existing structural integrity of the frame itself as the load-bearing element.
The no-drill window hammock system:
- Tension rod mounting — use heavy-duty 1-inch diameter spring tension rods (the same type used for curtains) inserted into the window frame recess at two heights: one at the bottom of the upper frame and one approximately 12 inches below it
- Hammock platform — heavy canvas or ripstop nylon sheeting, grommeted at four corners, with carabiner clips connecting to the tension rods
- Load rating — tension rods of this specification typically rate for 20–30 lbs of evenly distributed weight; verify your specific rod’s rating before use
- Covering — a removable fleece pad on the hammock surface provides grip and thermal comfort; attach via velcro tabs sewn to the fleece and glued to the canvas with fabric adhesive
The enrichment dimension of this system:
A window hammock at cat eye-level provides constant visual, auditory, and olfactory stimulation from outdoor events — birds, pedestrians, weather, other animals — that serves as genuine cognitive enrichment throughout the day. We’ve explored the full behavioral science of window-based enrichment in our guide to feline environmental enrichment with puzzle feeders.
Safety specifications:
- Install at a height that allows your cat to reach the hammock from an adjacent surface — do not require a jump from ground level to a 5-foot-high hammock
- Ensure the tension rods are fully compressed and cannot be dislodged by a cat landing with force — test by pressing down on each rod with 1.5x your cat’s body weight
- Inspect grommet integrity monthly — metal grommets can develop stress cracks at connection points under repeated load
Hack 5: The Independent Scaffolding System
The Independent Scaffolding System is the most architecturally ambitious of the diy renter friendly cat shelves approaches — and the one that produces the highest-capacity vertical environment without any wall contact whatsoever.
The mechanical principle: Industrial pipe shelving systems — the kind used in retail displays and restaurant kitchens — use floor-standing pipe frames with cross-bracing to create structurally stable multi-level platforms. These systems are entirely freestanding, rated for hundreds of pounds of distributed load, and completely reconfigurable.
The components:
- Kee Klamp or similar industrial pipe fittings — galvanized steel, compatible with 1-inch or 1.5-inch galvanized pipe
- Pipe lengths — cut to your ceiling height minus 2 inches for vertical members; cut to your desired shelf width for horizontal members
- Pipe feet — rubber-footed flanges that screw onto the base of each vertical pipe, distributing load across the floor without scratching
- Shelf platforms — 3/4-inch plywood or bamboo board, resting on the horizontal pipe members and secured with pipe clamps
- Non-slip surface — cork sheet, sisal, or anti-slip rubber matting on each platform surface
The full scaffolding configuration I built for Oliver:
- Four vertical pipes: two at 7 feet, two at 5.5 feet, creating a stepped-height framework
- Five horizontal cross members at varying heights between 3 and 6.5 feet
- Four shelf platforms at 3ft, 4.5ft, 5.5ft, and 6.5ft
- Two diagonal cross-bracing pipes connecting the upper and lower frame sections for lateral stability
- Total system weight: approximately 45 lbs empty — heavy enough that spontaneous movement requires significant force
The Security Deposit protection advantage:
When I eventually vacate this apartment, the entire scaffolding system disassembles in approximately 20 minutes, leaves zero marks on any surface, and moves with me to the next apartment — where it will reassemble in a completely different configuration based on the new space.
This is the ultimate diy renter friendly cat shelves philosophy: build something that serves your cat better than a permanent installation and costs you nothing when you leave.
The Vet Tech Safety Audit: Surface Traction and Weight Ratings
Before Oliver is permitted on any new platform I build, every surface passes what I call my clinical safety audit — the same systematic assessment I’d apply to any patient-contact equipment in a veterinary facility. If you decide a ready-made option is safer than a DIY build, compare our guide to the best cat wall shelves before choosing brackets, shelf depth, and traction materials.
The Five-Point Safety Audit:
Point 1 — Surface Friction Assessment:
Every platform surface must provide adequate Surface Friction to prevent slip-and-fall during both landing and departure. Test by placing your palm flat on the surface and applying lateral force — it should resist sliding. Smooth wood, laminate, and painted MDF all fail this test without a traction overlay. Acceptable surfaces: sisal, cork sheet (minimum 3mm thickness), anti-slip rubber matting, indoor-outdoor carpet tile, or rubberized paint.
Point 2 — Load-bearing Integrity:
Apply 2x your cat’s body weight as a static downward load to the center of each platform and hold for 30 seconds. Any deflection greater than 1/4 inch, any audible stress cracking, or any movement in the mounting system constitutes a failure requiring immediate reinforcement before cat access.
Point 3 — Edge Safety:
All platform edges should be either routed smooth (no sharp corners), wrapped in sisal rope, or fitted with edge banding. A cat who misjudges a landing and contacts a sharp plywood edge can sustain lacerations — I have treated these injuries in the clinic and they are entirely preventable.
Point 4 — Inter-Platform Jump Distance:
The maximum horizontal jump distance between connected platforms should not exceed 24 inches for cats under 10 pounds, or 20 inches for senior cats (over 10 years) or cats with any orthopedic history. Vertical jump heights between connected platforms should not exceed 18 inches to protect carpal and tarsal joints from repeated high-impact landing forces.
Point 5 — System Stability Under Dynamic Load:
A static weight test is necessary but not sufficient — cats don’t approach platforms statically. They land at speed, change direction mid-platform, and occasionally launch from surfaces with explosive force. Test dynamic stability by striking the platform sharply from below while the system is at full tension/compression. Any wobble, shift, or audible joint movement requires structural reinforcement.
The joint protection imperative:
As a vet tech, I want to specifically address senior cats and those with orthopedic conditions. Diy renter friendly cat shelves for these populations require:
- Maximum platform height reduction (no platform above 5 feet)
- Ramp integration between levels rather than relying solely on jumps
- Increased platform surface area for stable landing
- Softer surface covering (memory foam pad under sisal) to reduce impact force on arthritic joints
- Lower inter-platform height differentials (maximum 12 inches between connected levels)
Renter Diplomacy: How to Document ‘No-Damage’ for Your Landlord
The Security Deposit protection strategy is as important as the structural engineering — because the best diy renter friendly cat shelves system in the world becomes a problem if your landlord interprets it as a lease violation or charges you for phantom damage upon move-out.
The Pre-Installation Documentation Protocol:
Step 1 — Move-in condition photography:
Before any system is installed, photograph every wall surface, ceiling, and floor area where your system will contact or be adjacent to. Use high-resolution photos with timestamps and upload them to a cloud service with automatic date stamping. This is your baseline evidence.
Step 2 — Written landlord notification:
Send a brief, professional email to your landlord or property manager describing your intended system: “I am installing a freestanding, no-drill vertical enrichment system for my cat. The system uses tension poles and freestanding furniture and will make no contact with walls, create no holes, and leave no marks. I am happy to provide documentation of the system design if useful.” Keep a copy of this email and any response.
Step 3 — Installation documentation:
Photograph the completed system from multiple angles, clearly showing the absence of any wall contact, drilling, or adhesive. Document every contact point between your system and the apartment surfaces (floor pads, ceiling felt, furniture feet).
Step 4 — Protective surface protocols:
- Under every furniture foot: 1/4-inch furniture felt pads on hardwood or tile floors; furniture cups on carpet
- Under every tension pole base: a 6-inch square of non-slip rubber mat, then felt
- At every ceiling contact point: layered felt as described in Hack 1
- Under every bookshelf foot: felt pad minimum 3mm thickness
Step 5 — Move-out documentation:
Photograph every previously documented surface again immediately upon system removal, before cleaning, using the same angles as your installation photography. This before-and-after documentation makes any Security Deposit dispute over system-related damage essentially impossible to sustain.
The landlord conversation framework:
If your landlord questions the system directly, lead with the welfare language: “The AAFP recommends vertical space as a medical necessity for indoor cats. I’ve engineered a system that meets that need without any modification to the apartment.” Most landlords respond better to clinical necessity framing than to “my cat wants to climb things.”
Frequently Asked Questions
1. Are no-drill cat shelves safe for heavy cats?
Yes — but the system design must be specifically calibrated for the cat’s weight, and not all no-drill methods are appropriate for every weight category.
Tension pole systems and Independent Scaffolding Systems are structurally appropriate for cats up to 20+ pounds when correctly specified — use poles of minimum 1.75-inch diameter, platform surfaces of minimum 3/4-inch plywood, and verify Load-bearing Capacity at 2x body weight before allowing access.
The Bookshelf-Bridge Hack using IKEA Billy shelves is rated for substantial loads but requires furniture connector bolt reinforcement at the bridge connection. Command Strip-based systems are not appropriate for cats over 10 pounds regardless of strip rating — dynamic loading during landing consistently exceeds static weight ratings.
For cats over 15 pounds, also reduce maximum platform height to 5.5 feet maximum and incorporate ramp access between levels to reduce joint impact from repeated high landings.
2. Do Command Strips really work for cat shelves?
The honest vet tech answer is: sometimes, within a very narrow set of conditions. Large Command Strips (the heavyweight picture-hanging variety) are rated for up to 16 pounds of static load on non-porous surfaces — smooth-painted drywall, tile, or glass.
For a cat under 8 pounds on a small shelf with minimal dynamic loading, this can work. However, Surface Friction failures and adhesive creep under sustained load are genuine failure modes I have documented personally, and a Command Strip failure with a cat on the shelf is a fall-risk event with potential for serious orthopedic injury.
If you use Command Strips for any diy renter friendly cat shelves application, use a minimum of four strips per shelf (one at each corner), verify surface compatibility with the manufacturer’s testing protocol, load-test at 2x your cat’s weight for 24 hours before allowing cat access, and inspect adhesion weekly.
I use Command Strips exclusively as a supplementary stability measure alongside mechanical systems — never as the sole load-bearing element.
3. How do I stabilize a cat tree without drilling into the wall?
The most effective no-drill stabilization method is the furniture-anchor technique: position the cat tree base within 4 inches of a heavy, floor-standing piece of furniture (a filled bookshelf, a heavy dresser, a solid wardrobe), then use two adjustable furniture safety straps — the type sold for earthquake-proofing furniture — to connect the cat tree to the adjacent furniture at mid-height and upper-height points.
This creates a lateral stability system that prevents tip-over in any direction without any wall contact. Additionally, add ballast weight to the base of the cat tree: a flat paver stone or a filled fabric sandbag placed inside or beneath the base adds 10–20 pounds of low-center-of-gravity stability.
Verify that the combined furniture-anchor system resists tip force by applying 1.5x your cat’s body weight laterally at the highest platform — the system should flex no more than half an inch in any direction before returning to center.
Final Thoughts: The View From Seven Feet
Oliver is currently on the top platform of the scaffolding system, approximately seven feet above my kitchen floor, observing the preparation of his dinner with the sovereign detachment of a cat who has achieved the altitude he always deserved.
He got there via the tension pole at the living room’s north corner, across the bookshelf bridge, and up the over-door expressway — a route that took him approximately 11 seconds and zero floor-level contact. The landlord has visited twice since installation and has not commented on the system beyond asking where I bought “that interesting shelving.”
Diy renter friendly cat shelves built on mechanical integrity, clinical safety standards, and thoughtful renter diplomacy are not a workaround. They are, in many respects, a better solution than permanent wall-mounted systems — reconfigurable, portable, deposit-safe, and entirely calibrated to your specific cat’s weight, age, and athletic capacity.
Providing high-level escape routes and vertical territory through diy renter friendly cat shelves is also an essential component of the behavioral boundary protocols we cover in our guide on how to stop your cat from running out the door — a cat with adequate vertical territory at home has significantly less motivation to seek it by bolting through open doors.
The lease said no drilling. It said nothing about physics.
Build upward. Your cat is waiting.
References
¹ Ellis, S. L. H., Rodan, I., Carney, H. C., Heath, S., Rochlitz, I., Shearburn, L. D., Sundahl, E., & Westropp, J. L. (2013). AAFP and ISFM Feline Environmental Needs Guidelines. Journal of Feline Medicine and Surgery, 15(3), 219–230.
² Kry, K., & Casey, R. (2007). The effect of hiding enrichment on stress levels and behaviour of domestic cats (Felis sylvestris catus) in a shelter setting and the implications for adoption potential. Animal Welfare, 16(3), 375–383.
-300x169.png)
-300x169.png)
-300x169.png)